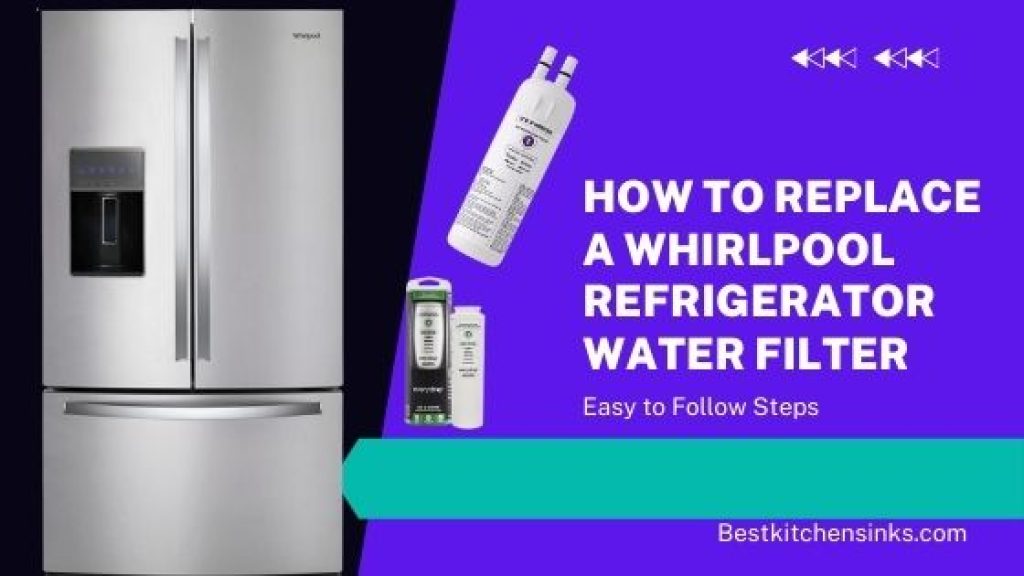
Does your Whirlpool refrigerator smell stinky? Don’t worry it’s not the fault of the refrigerator. But you are landed up at the right place to know how you can easily replace the water filter.
Actually, a smelly thing happens when it is time to replace the filter and you don’t replace it. Mostly the filter of a whirlpool refrigerator needs to be replaced after every six months. If such is not replaced after a reasonable period it starts smelling and tase of water use to get change.
In addition to this water filters also slow down the trickling rate of water out of the cooling chamber of the refrigerator. Due to this slower speed, smaller blocks of ice do not produce.
Let’s get into the simple process of how to replace the water filter in the refrigerator. It is so simple that you can replace it without any specific tool, training, or specialized skill set. However, you must ensure that you have the right water filter as per the model of your refrigerator before replacing it with the existing one.
Just in case, if you will try to connect the different water filters with the waterline it will not get fit properly and leakage will occur. Just write down the model of the refrigerator and the product id or code written on the water filter that you are going to replace. This thing will ensure that you will get the exact match product according to the model of your refrigerator.
Read: Best Under Sink Water Filter of 2022 – Complete Buying Guide & Reviews
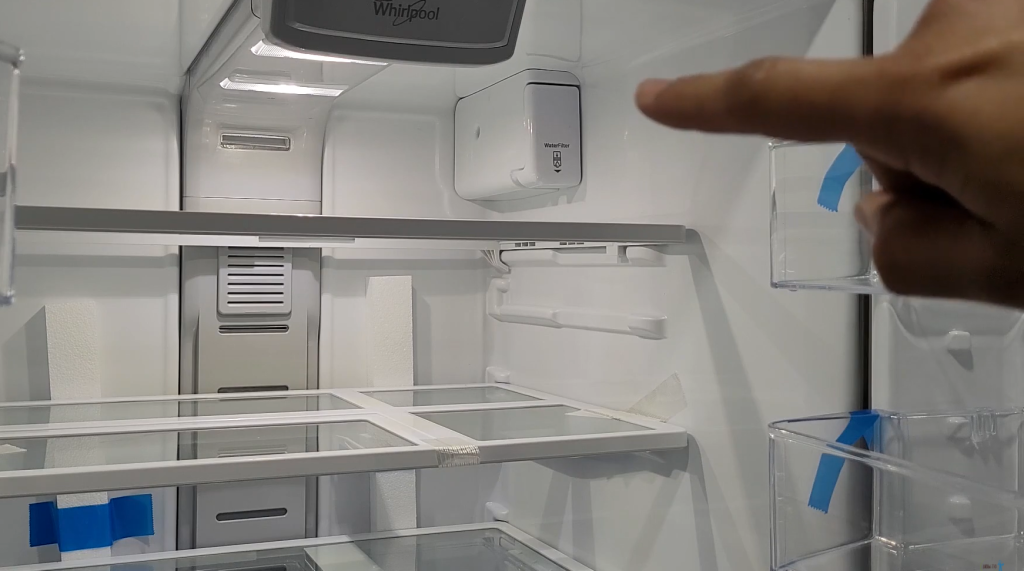
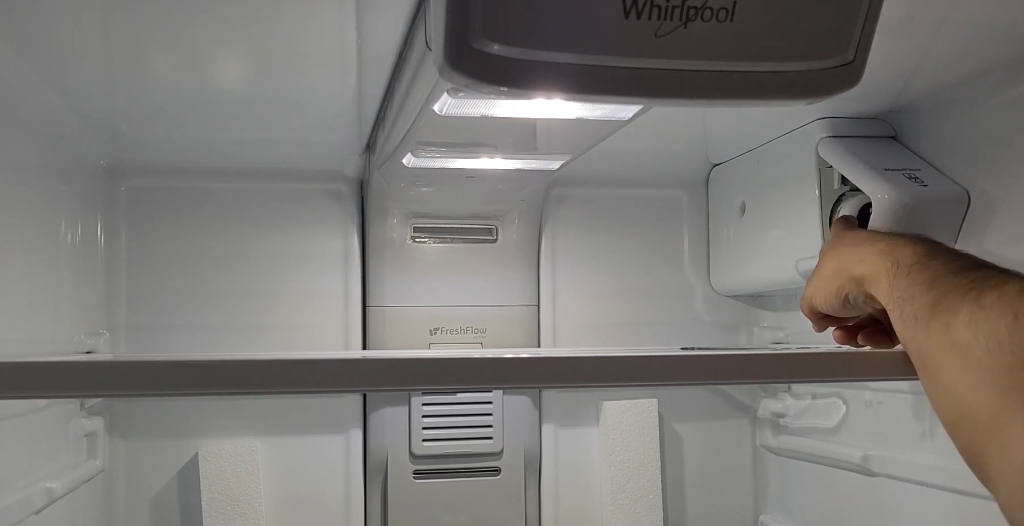
Step 1: Location of Water Filter
You should know the exact location of the water filter in your refrigerator. It solely depends upon the model of your refrigerator. In some models, it is found in the base of the refrigerator under the grills. While on the other hand sometimes it is found inside the body in the upper right corner on the backside of the refrigerator. The user manual of your refrigerator will help you to identify the exact position of the water filter in your whirlpool refrigerator.

Step 2: Site Preparation
Make sure that you have removed the beverages and every type of food from the refrigerator before removing the water filter. When you remove the old water filter there may be a little bit of spilling of water. Therefore, it is better to place a towel inside the fridge.
If there is an ice-making compartment in your refrigerator make sure that it is turned off before changing the water filter. Sometimes, ice in the maker starts spilling down in the grill area and may affect the items over there. In addition to this in some models, you need to cut off the water supply before replacing the water filter. On the other hand, in some of the models, you have no need to cut off the water supply rather it automatically stops the water supply when you detach the old water filter.
In addition to this note that as there is no electric part gets involved so there is no need to disconnect the electric supply.
Step 3: Removal of Water Filter
It depends upon the model of your refrigerator and how to remove the water filter fitted in it.
Some models have a button to fix the water filter. When you press this button, it detaches the old filter from itself. On the other hand, in some models, you have to twist the water filter on either side and it gets released from its point.
If you are facing some problems in removing the water filters, you should wither press the button more firmly to make sure that it has been pressed enough to remove the water filter.
Recommended: Water Filter vs Reverse Osmosis – Which One to Choose?
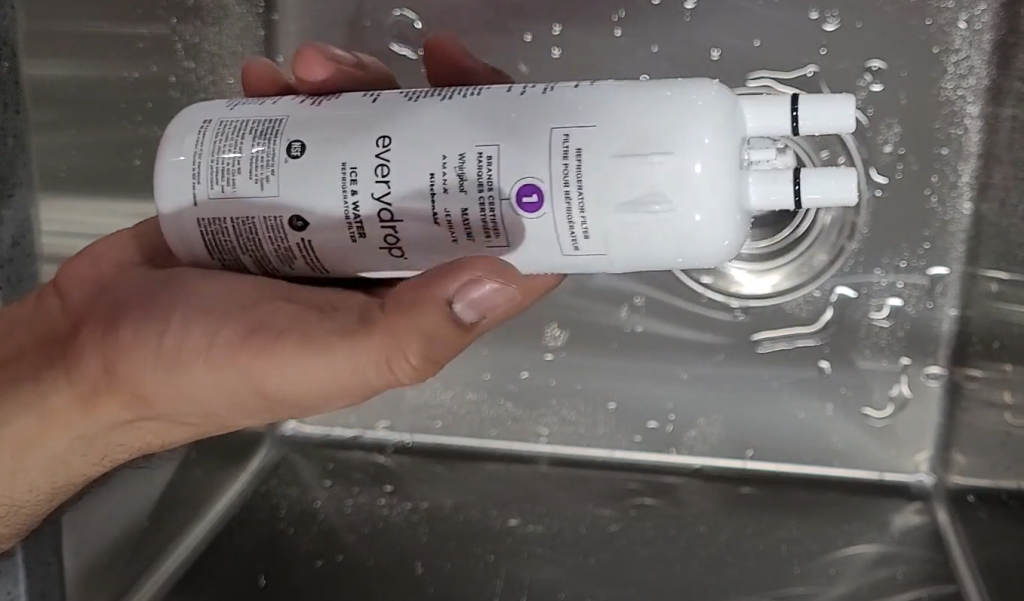
Step 4: Installation of new filter
Just like the removal of a water filter and the installation of a water filter also depends upon the model of your refrigerator.
After removal of the old water filter, you need to place/hold the new water filter in the same direction facing towards the grill as the old water filter you have just removed. If it has the arrows then connect these arrows with the arrows on the grill and push them towards in side of the hole in the refrigerator. You will have to push it inside until you hear a clicking voice.
Similarly, in some models after placing the new water filter on the fitting point you have to move it either clockwise or counter-clockwise and wait for a click sound. This will ensure the fitting of the new water filter.
Step 5: Running of water through the system
A whirlpool refrigerator needs four gallons of water once it is replaced with the new one. So, it is recommended when you change the new water filter, you need to run water through the water pipes system. It removes or flushed out any carbon fines or other impurities particles.
If you are unable to run water at a time you need to run one gallon of water at least four times to complete the requirement.
Once you are done with this water run, you are good to go to enjoy a well-deserved glass of filtered water got thru a new water filter.